Monday, April 30, 2012

Cast Iron Seasoning

I have used cast iron skillets for years.  Love them!  I have ones from my
mother (after they had gotten too heavy for her to use easily) and my 
grandmother.  I recently bought four 6-inch cast iron skillets at
World Market (I still want to call it Cost Plus). Unfortunately, they lack the
beauty and function of being seasoned and non-stick.  Although over time,
if washed and used properly, they develop that rich beauty of
well-seasoned cast iron!  So, before I can use them, I want to 
give them a pre-seasoning - and give them a good start in life!
Here is what they look like just purchased and after a good hand washing.  
Its important to wash them first because the manufacturer often
puts a rust inhibitor on them.  Ick!  Lets wash that off!
As you can see in the pic, there is a little box of that bad
four-letter word L-A-R-D.  It reads "Manteca" which is Spanish for "Lard".
(We have a lot of that here in SoCal.)  I have many, many fond childhood
memories of foods using lard.  Fried chicken, flour tortillas, refried
beans.  Omg-ness!  Yum! But yes unhealthy and I would never use 
lard for anything but seasoning cast iron these days.  You can also season
cast iron with Crisco shortening but I think good 'ole lard is still the best and cheapest! 
Give them a really good slathering of lard.  On the insides, outsides, and on
the handles.  I don't put it on the bottoms.  I feel it isn't necessary
because the bottoms come in contact with the flame or direct heat source.
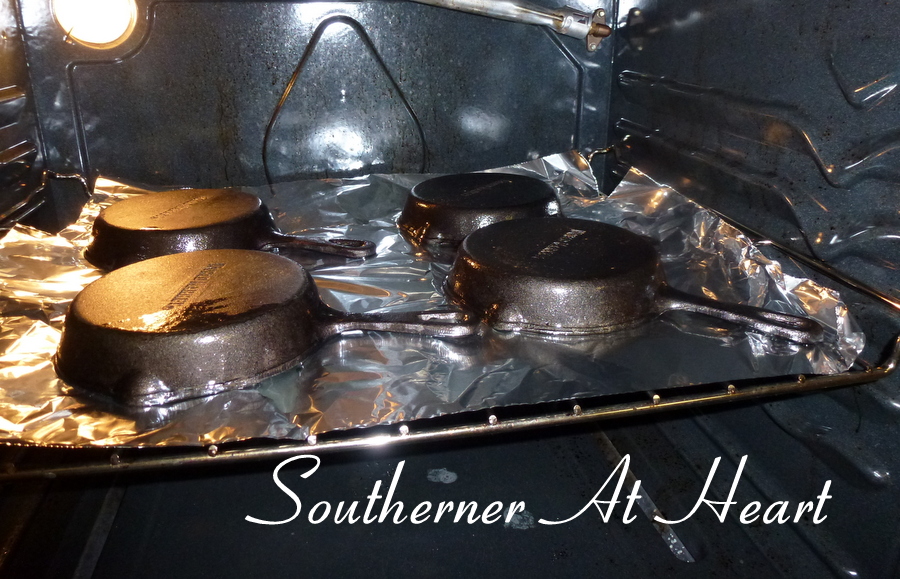
I place them in a 200 degrees Fahrenheit oven, upside down, so any
melted lard won't pool and bake inside the skillet.   I line my
baking rack with foil so any dripping, melted lard won't bake
onto my baking rack.  I keep them baking in the oven for 3 hours
which allows for the lard to really bake into the pores of the
cast iron.  After 3 hours, I turn the oven off.  I like to do this
in the evening so I can allow them to cool down in the oven overnight.
Here they are cooled down and out of the oven.  Glistening and ready to 
begin using.  As they are used, remember NOT to use soap in them.  You can 
use a plastic scrubber (if you just have to!) but scrub gently so you don't scrub
off any seasoning.  Always dry over a low flame/heat.  As I use them a few 
times, because these are so new, I will apply a light coating of lard with 
paper towel after they are dry but still hot on top of the flame.  Let them 
"cook" slightly (a minute or two!) on top of the flame, then lightly wipe 
with a paper towel.  This adds another small coating of seasoning. 
Let them cool down before handling them to store them.
Here I have returned them to the oven after been filled with my 
grandmother's Tamale Pie as individual tabletop servings. 
 Please re-visit me in a few days when I will be sharing her
Tamale Pie recipe with you along with a tablescape.


Thank you for visiting! 


Fondly,
Karen


Sunday, April 29, 2012

Margarita Cake

Cinco de Mayo is a week away.  
What better way to celebrate than with
a margarita and a margarita cake!

I don't use cake mixes often, but this cake is a what I call a
"doctored up" cake.  All cake mixes can be doctored up by using 
something other than water as the liquid and adding other flavors.
In this cake the liquid used is Margarita Mix (the lemon lime
mixer without the alcohol used for making margaritas).
It starts out with a butter, sugar, and crushed pretzels crust pressed
into the bottom of the pan than topped with the combined cake
ingredients.  One hint?  As you mix together the cake batter, be sure to
get all the delicious lime peel that collects on the beater(s)! 
Once the cake is baked and cooled, it is topped with Cool Whip.
I like to grate more lime peel over top to give a hint as to the
flavor inside.  I wish I could remember where I found this recipe
to give credit where credit is due.  I want to say it was from one of
Southern Living's special interest magazines or maybe
Betty Crocker?  I just can't remember! 
The Cool Whip makes it a refreshing cake and the pretzel crust
gives the taster that delicious salt-sweet taste.
I hope you enjoy it as much as I do.
Here is the recipe:

Recipe:
Margarita Cake

1 1/2 cups coarsely crushed pretzels (apx. 3 1/2 c. small pretzel twists)
1/2 cup sugar
1/2 cup butter, melted
1 box Betty Crocker SuperMoist white cake mix
1 1/4 cups bottled nonalcoholic margarita mix
1/3 cup vegetable oil
1 T. grated lime peel [more for sprinkling on the top]
3 egg whites
1 container (8 oz) frozen whipped topping, thawed

350 degrees (shiny metal or glass pans)  325 degrees (dark or nonstick pans)
1.  Spray bottom only of 9x13 pan with nonstick spray with flour.  In medium bowl, mix pretzels, sugar, and butter.  Sprinkle evenly on bottom of pan; press gently.
2.  In a large bowl, beat cake mix, margarita mix, oil, lime peel, and egg whites with electric mixer on low speed 30 seconds.  Beat on medium speed 2 mins., scraping bowl occasionally.  Pour batter over pretzel mixture.
3.  Bake 35-40 minutes or until light golden brown and top springs back when touched lightly in center.  Cool completely, about 1 hour.  Frost with whipped topping.  Store covered in refrigerator.  (High Altitude 3500-6500 ft. - Bake 40 to 45 minutes.)

Enjoy!

I will be joining:
and


Have a great week and enjoy Cinco de Mayo!
Just another reason to have fun! 

Fondly,
Karen

Wednesday, April 18, 2012

Butterscotch Brownies with Brown Sugar Butter Icing and a Favorite Cookbook

I am so excited to share with you this terrific cookbook. 
One of my all-time favorites.
Jacket photographs by Laurie  Smith and designed by Toni Tajima

Pastry Queen Parties
Entertaining Friends and Family, Texas Style
by Rebecca Rather and Alison Oresman

Rebecca is the chef-owner of the renowned Rather Sweet Bakery and Cafe
in the Texas Hill Country town of Fredericksburg.  Although her
bakery and cafe is no longer open, the link will still give you
glimpse of the talent she is.

This cookbook has more than 100 recipes and includes menus for
homecoming picnics, hacienda dininga ranch-style supper, 
summer beach bonanza, and even a big city cocktail party.
What I also like about this cookbook is that there is a "Do It Early" 
portion to every recipe.  I'm all for doing it ahead.
With our busy schedules, aren't we all?
Jacket photographs by Laurie  Smith  and designed by Toni Tajima

Just look at the back cover!  A Rustic Bread Salad (Yep - made that!) in a
huge galvanized pail.  Now that will feed a party!   The pictured
Watermelon Salads with Tequila-Lime Dressing 
served in small watermelons is a favorite also.
I will say the recipe I make the most is the 
Butterscotch Brownies with Brown Sugar Butter Icing

It starts with mixing butter and brown sugar; then adding eggs and vanilla.

A dry mixture is added
then spread into a half-sheet pan, and baked.
Just out of the oven! 
After a complete cool down, it is spread with a deliciously
sweet Brown Sugar Butter Icing.  Be sure to spread the warm
icing quickly before it begins cooling down, making
the icing harder to smooth out.
As you can see, my does it make a lot!
And it keeps three days if uncut.
I'll keep a few at home and take the rest to share at work.
Yum!

Recipe:
Butterscotch Brownies with Brown Sugar Butter Icing
Courtesy of Rebecca Rather and Alison Oresman in Pastry Queen Parties
Makes about 2 1/2 dozen 2 by 3-inch bars.
Brownies:
1 cup (2 sticks) unsalted butter, at room temperature
3 cups firmly packed golden brown sugar
4 large eggs
1 tablespoon vanilla extract
3 cups all-purpose flour
1 tablespoon baking powder
1 teaspoon kosher salt
2 cups chopped pecans, toasted
Icing:
1 cup (2 sticks) unsalted butter
2 cups firmly packed golden brown sugar
4 cups powdered sugar
1/3 cup half-and-half
1 tablespoon vanilla extract
To Make the Brownies:  Preheat the oven to 350 degrees.  Line a half-sheet (13 by 18-inch) pan with aluminum foil and grease with butter or cooking spray.  Using an electric mixer fitted with the paddle attachment, beat the 1 cup butter and the 3 cups brown sugar on medium-high speed until fluffy, about 2 minutes.  Add the eggs and 1 tablespoon vanilla and continue beating for another minute.  In a bowl, stir together the flour, baking powder and salt.  Beat the flour mixture into the butter mixture on low speed until incorporated.  Stir in the pecans.  Pour into the prepared pan, smoothing the top.  Bake until the bars are set and slightly puffed, 25 to 30 minutes.  Cool completely before icing.
To Make the Icing:  In a saucepan set over medium heat, melt the 1 cup butter and 2 cups brown sugar.  Once the mixture is lightly bubbling, decrease the heat to medium-low and cook, stirring occasionally, for 2 more minutes; set aside.  Using an electric mixer fitted with the paddle attachment, beat the powdered sugar, half-and-half, and vanilla on medium speed until creamy, about 1 minute.  Add the melted butter mixture and beat until combined.  Pour over the cooled brownies and spread evenly.  Let the brownies sit for about 30 minutes to allow the icing to firm up before cutting into square.

Do make these and enjoy them as much as I do!

This week, I'll be joining:

Foodie Friday


Thank you for visiting!

Fondly,
~ Karen

Sunday, April 1, 2012

A Bunny and Bees Vignette

Bunnies are everywhere this time of year!
I picked up this bunny at Tuesday Morning the other day
because of its golden-butter color.  I brought it home and planted
some springtime flowers in it:  purple/yellow violas and pink petunias.
The pictures of my children were taken by a dear friend at Kate Session's Park.
I placed the bunny on a dresser draped with burlap along side a pink 
English transferware plate depicting "Gov. Langdon Mansion Where
George Washington Was Entertained.  Portsmouth, N.H."
I collect pink transferware but this one is extra special because "Langdon"
is a family name for my children on their other side.  Who knows? 
Governor Langdon may have been a distant relative of their's.  
You can see the Governor's Mansion a little better here - just above a bee.
I seem to be naturally drawn to things with bees.  This is a beeswax 
candle stuck with a metal bee.  The silk flowers to the left were
leftover from my Easter tablescape here
Just behind the bunny are another two beeswax candles stuck
with two more bees.  I bought these candles and bee sticks
separately and quite possibly both at Home Goods.  
The plants are outdoor plants so I don't expect them to last very long.
I'm hopping my bunny will last and be pretty to look at until Easter. 
Then I will transfer the plants outside to the garden where I'm sure
they will be happier and among their favorite bees!

I will be joining some new (to me!) parties this week.  
I hope you check them out!

Seasonal Sundays over at The Tablescaper
The Bunny Blog Hop beginning April 2 over at French Country Cottage
Tabletop Tuesday over at A Stroll Thru Life


Thanks for visiting me and I wish all of you a
Very Happy Easter!

Fondly,
~ Karen

Tuesday, March 27, 2012

Hooray for Spring with an Easter Tablescape and Tangerine Cupcakes

I love spring.  In fact, I wait all winter for spring!
I really do.  Its one of my favorite times of the year.  Everything around
me seems to be waking up and coming alive.  I love all the blooming
flowers and the happily singing birds.  I think people in general seem happier!
It makes me want to wear white pants, white skirts, and PASTELS.
I haven't yet brought out my white pants (mainly because we've been
having so much rain here in SoCal) but I have the pastels.

With Easter just around the corner, I brought out the
pastels in this tablescape. 

Mom and I were expecting my cousins for the day and I thought
I'd surprise them with this festive table and cupcakes!  

Their 7-year old's eyes lit up when seeing the table saying, "It is
beautiful!", and felt very special when he finally got to
sit for lunch and drink from the green Dollar Tree wine glasses! 
That's what its all about.  Making guests, at any age, feel special.
Giving them a feast for their eyes and also their tummies! 

We actually did serve a nice lunch but the star attractions were
the Tangerine Cupcakes with Coconut Frosting.
Growing up, we always had a coconut cake at Easter.
And who doesn't still get excited about a cupcake?
Especially when it's on its own pedestal.
(An upside down candlewick glass.)

These cupcakes are so delightful and the flavor recognizable!
I did use fresh tangerine peel but, after searching four grocery stores
for frozen orange-tangerine juice concentrate without any luck, had
to settle using frozen Orange-Mango juice concentrate.  I really didn't
want to use plain frozen orange juice concentrate.  Of course, this
means for the rest of my life I will never be able to pass a frozen juice
aisle without peeking to see if it carries the orange-tangerine blend... 
and I will buy it and make these cupcakes again.  This recipe is a 
"keeper" and the reason I am sharing it with you. 

 Recipe:
Tangerine Cupcakes with Coconut Frosting
Courtesy of:  Better Homes and Gardens

Ingredients:
4 eggs
4 egg yolks
1/2 cup buttermilk
1 teaspoon vanilla
1/2 cup cooking oil
2 1/3 cups cake flour
2 teaspoons baking powder
1/2 teaspoon salt
1/4 teaspoon baking soda
3/4 cup butter, softened
2 cups granulated sugar
1 tablespoon finely shredded tangerine or orange peel
3 tablespoons frozen orange tangerine blend concentrate, 
     or orange juice concentrate, thawed

Frosting:
1 8 ounce package cream cheese, softened
6 tablespoons butter, softened
1/2 teaspoon vanilla
3 cups powdered sugar
Flaked coconut

Directions:
1.  Line 30 muffin cups with paper baking cups.  In a medium bowl, whisk together eggs, egg yolks, buttermilk, the 1 teaspoon vanilla, and the cooking oil; set aside.  In another bowl, stir together cake flour, baking powder, salt, and baking soda; set aside.

2.  In a large mixing bowl, beat 3/4 cup butter with an electric mixer on medium to high speed for 30 seconds.  Gradually add granulated sugar and the peel.  Alternately, add flour mixture and egg-buttermilk mixture stopping to scrape bowl as needed.  Add the thawed concentrate; mix until just combined.

3.  Fill prepared muffin cups two-thirds full.  Bake in a 350 degree F oven for 18 to 20 minutes or until cupcakes are golden brown and spring back when lightly pressed.  (Cupcakes will dip slightly in centers).  Cool on a wire rack for 10 to 15 minutes.  Remove cupcakes from pan and cool completely before frosting.

4.  For frosting, in a large mixing bowl beat cream cheese, the 6 tablespoons butter, and 1/2 teaspoon vanilla until combined.  Gradually, add powdered sugar; beat until smooth.  Frost cupcakes and sprinkle with flaked coconut.  Makes 30 cupcakes.

Enjoy!

Sources:
Mikasa Antique White Plates, Cabbage Plates:  Home Goods
Tablerunner, Lenox Napkins, Placemats, Candleholder, Candles:  Home Goods
Wine Goblets:   Dollar Tree
Candlewick Glasses:  Mom's
Rattan Chargers and Solid Chocolate Bunnies:  World Market
Candlesticks:  Garrity's 
Cupcake Baking Cups, Silk Flowers:  JoAnn's Fabrics

I will be joining the following parties this week:


Thank you for visiting! 


Fondly,
~Karen

Wednesday, March 21, 2012

Kentucky Bluegrass Salad


I had dinner at my younger daughter’s home the other night.
She recently began eating Vegan which can be a challenge (for me!).


For our entrée, she made a mixture of ground soy non-beef,
cremini mushrooms, and seasonings stuffed and baked in red
and yellow peppers with a side of roasted Idaho and sweet potatoes.

I volunteered to make a salad because I had a bottle of Cranberry
Pear White Balsamic Vinegar that I told you all about in a
recent post HERE that I have wanted to try and knew
just the salad I would make!

My salad is called a Kentucky Bluegrass Salad and is traditionally
made with Bibb lettuce which Kentucky is apparently famous for.

For my Vegan sweetie (whose favorite color is orange), I served the
blue cheese on the side and only pan-toasted the walnuts.
It can be a beautifully presented salad and “dressed” tableside.
The pears were still a little firm but gave it a pleasant sweet
crunch to the salad.  I also roasted the asparagus in the oven
for a few minutes for added flavor.


Recipe:
Kentucky Bluegrass Salad
Source:  Southern Living

Ingredients:
1 Tbsp. butter
¾ cup walnuts
2 heads romaine lettuce (or 4 small heads of Bibb)
2 pears, chopped
1 cup asparagus tips
½ cup crumbled blue cheese
½ cup dried cranberries

Melt butter in a skillet over medium heat; add walnuts, and sauté 5 minutes or until lightly browned.  Remove walnuts with a slotted spoon and set aside.  Toss together lettuce, pears, asparagus and toasted walnuts.  Sprinkle with cheese and cranberries; drizzle with dressing.

Dressing:
½ cup vegetable oil
¼ cup rice vinegar
1 Tbsp. balsamic vinegar
2 Tbsp. sugar

Whisk together.

This salad is impressively easy and I hope you give it a try
and enjoy it as much as we did.

I will be adding this salad along side many other tasty recipes at:


Thank you for visiting me!

Fondly,

Karen

Saturday, March 17, 2012

Olive Oil Tasting in Coronado

We all have heard of wine tasting. 
But, how about olive oil tasting?

On beautiful Coronado island, on Orange Avenue and before you 
get to the Hotel Del Coronado, is Coronado Taste of Oils


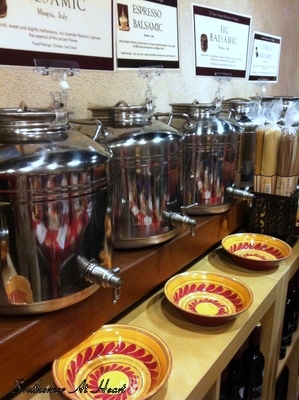
Walk-ins can sample flavored olive oils


as well as flavored and aged balsamic vinegars. 


By dipping small pieces of bread, or by tasting from a small plastic cup: 
you can sample Butter EVOO (Extra Virgin Olive Oil); 
Chipotle EVOO;  Meyer Lemon Olive Oil, 
Herbs de Provence Olive Oil, Basil EVOO, 
Cilantro Roasted Onion EVOO, Harissa Olive Oil, and more!

And how about... Espresso Balsamic; Lavender Balsamic; Vanilla Balsamic;
Sicilian Lemon White Balsamic; Dark Chocolate Balsamic; 
Tangerine Balsamic; Honey Balsamic; and oodles more!

Also available for purchase are adorable tablecloths,
wine-flavored (!!) dried pasta, and the artwork on the walls!

For pre-arranged parties of 10 or more, they offer an 
after-hours’ private evening of “tastings” along with a 
presentation on the positive impact olive oil has in our 
bodies... oh!  AND a four-course meal!

I was so lucky to participate in one of those evenings.


The tablecloth looked like it came straight from Italy.  As centerpieces 
running down the table, they placed clementines in pink English transferware
bowls ("Old Britain Castles", I believe) and added sprigs of rosemary.  
Marble tiles were used to  hold the cups, pieces 
of bread and for veggie chips sprinkled with aged balsamic vinegar (!!)

Our menu for the evening included:

Chipotle Hummus served with slices of Tuscan Olive Bread
Cranberry-Pear Vinaigrette Salad
Beef Bourguignon served over Vino Rosso Fettuccine
Olive Oil Carrot Cake with an Olive Oil-Cream Cheese Frosting
Affogato Floats:  Scoop of Walnut Oil Ice Cream drizzled 
with Espresso Balsamic


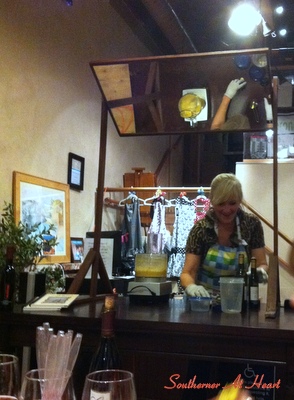
We watched a cooking demonstration on how to make the 
Chipotle Hummus...


as we enjoyed this delicious Chipotle Hummus 
appetizer with tasty Tuscan Olive Bread!  
(I've included both recipes below) 

RECIPE:
Chipotle Hummus
Courtesy of:  Coronado Taste of Oils

Ingredients:
3 15-ounce cans garbanzo beans, drained
1/2 cup "Coronado Taste of Oils" Chipotle Extra Virgin Olive Oil
1/2 cup fresh squeezed lemon juice
1/4 cup "Coronado Taste of Oils" Roasted Sesame Oil (ultra premium)
2 cloves garlic
1 teaspoon cumin


Method:
Put all ingredients into a food processor and pulse until smooth. Serve with pita bread and fresh veggies.


RECIPE:
Tuscan Olive Bread
Courtesy of: Coronado Taste of Oils


Ingredients:
20 green olives thinly sliced (pitted)
20 black olives thinly sliced (pitted)
1 cup whole wheat bread flour
4 eggs (or equivalent egg substitute)
1/2 cup Coronado Taste of Oils: Blood Orange EVOO
1/2 cup white wine
1 teaspoon baking powder
1/2 cup Gruyere cheese grated


Method:
In mixing bowl, add flour, 4 eggs and half the olive oil (1/4 cup).  Fold batter with spatula.  Dissolve teaspoon baking powder into remaining 1/4 cup olive oil and 1/2 cup wine.  Slowly whisk into batter until smooth.  Fold in cheese and olives.  Bake at 350 degrees in loaf pan for 10 minutes.   Reduce heat to 325 degrees and bake an additional 35 minutes until loaf is firm to touch.  Let cool.  Serve your bread with fresh hummus.


Our next course was a Cranberry-Pear Vinaigrette Salad 


Crisp pears placed over arugula and sprinkled with walnuts
and gorgonzola crumbles!  Here is this recipe:

RECIPE:
Cranberry Pear Vinaigrette Salad
Courtesy of: Coronado Taste of Oils

Ingredients:
1 bag fancy greens
2 fresh pears sliced
1 cup gorgonzola cheese crumbled
1 cup toasted walnuts
Dried cranberries
1/4 cup Coronado Taste of Oils: Cranberry Pear White Balsamic
1/4 cup Coronado Taste of Oils: Blood Orange EVOO
1 teaspoon orange honey
1 teaspoon Dijon mustard

Method:
Arrange greens on dish with sliced pears on top.  Sprinkle with walnuts, cranberries, and gorgonzola cheese.  For dressing: Whisk together balsamic, EVOO, honey and mustard.  Drizzle over salad to taste.


 And then, because I was so excited in visiting with my 
friends and being SO completely into my food that I 
completely forgot to take pictures of the remaining courses!


So sorry!  You'll have to use your imagination, but as you 
can imagine, it was delightful and tasty evening!

I came home with a bottle of Cranberry Pear White Balsamic 
and look forward to using it in a salad for an upcoming post.

Tell me, have any of you been olive oil tasting?

Thank you for visiting my blog! 

Fondly,
~ Karen
Related Posts Plugin for WordPress, Blogger...